Setting up Web Application Pentesting Tools
This post will walk you through how to set up the basics needed to do web app pentesting. More specificly, we’ll be setting up a web browser for pointing and clicking, an attack proxy for hackety hacking - all while covering the configuration needed.
What Tools do I Need to be a Hacker?
This post is not intended for script kiddies.
I’m not opposed to accessible tools or automatic scanners, though I believe you should know how they work and what they do before using them regularly. A skilled professional should ideally be able to make do with very basic tools, and use more advanced utilities only as a way to increase efficiency.
If you don’t understand the basics, then you will never be good at security testing.
The Attack Proxy
We could get a lot done with just a web browser, though it’s not the best way of working. We want to be able to control how we interact with the web application, and that means being able to:
- Audit requests and responses to/from the web server.
- Stop requests from being sent.
- Edit requests before they are sent to the web server.
- … list goes on.
We can use an HTTP proxy instead of instrumenting a web browser with these features. In this case we’ll have a look at the Burpsuite Community Edition.
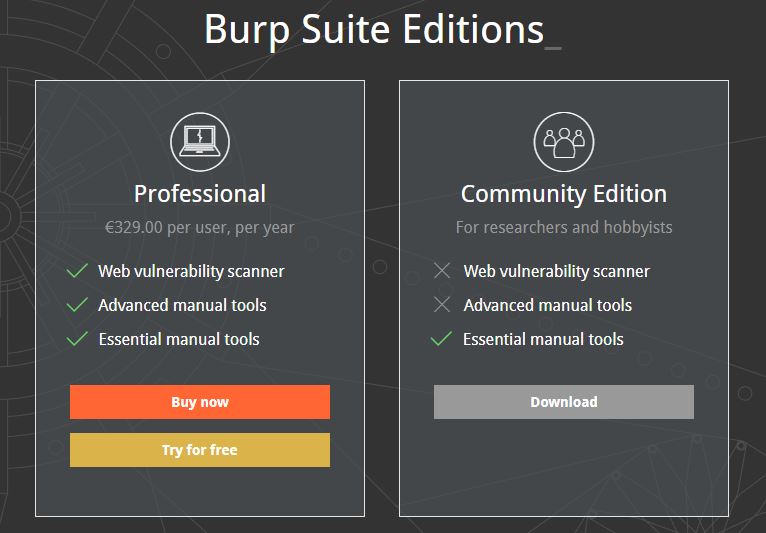
Head over tohttps://portswigger.net/burp and download the free community edition.
A note on the paid version. I can highly recommend getting the professional license, but only if you actually are going to use it for work. The free variant has everything you need when starting out or messing around.
Setting up Burp
It comes with good defaults, so you don’t have to do anything except actually installing it.
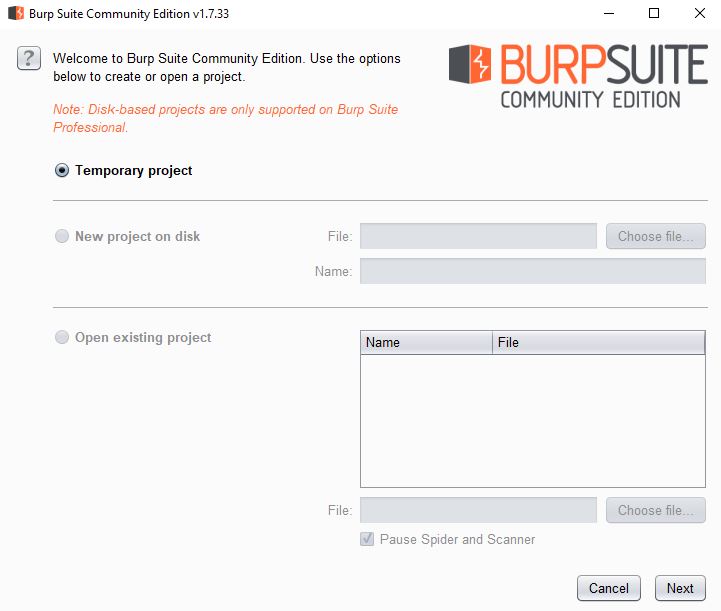
Burp organises stuff in “projects”. Projects contain project-specific settings together with all proxy data and state information. We’re free to use a temporary project in the community version. Pro users can either use persistent projects (data is written as you use it, recommended), or save snapshots of temporary projects.
Press Next.
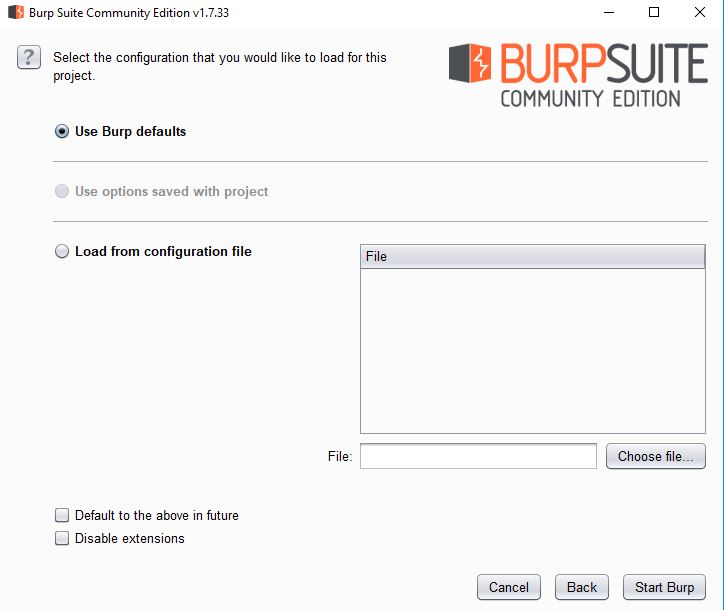
Next up is the project configuration. The defaults are okay. When you are comfortable with Burp and know what settings works best for you, then you are free to flush those specific settings to a JSON file, which could be used to speed up this step in the future.
Click Star Burp, and wait while it initialises a new temporary project for you.
A note on temporary projects. Or rather, a word of advice. Never rely on Burp not crashing. If you have important data in your project, copy it out of Burp immediately. For you this most likely translates into copying interesting URLs into notepad.
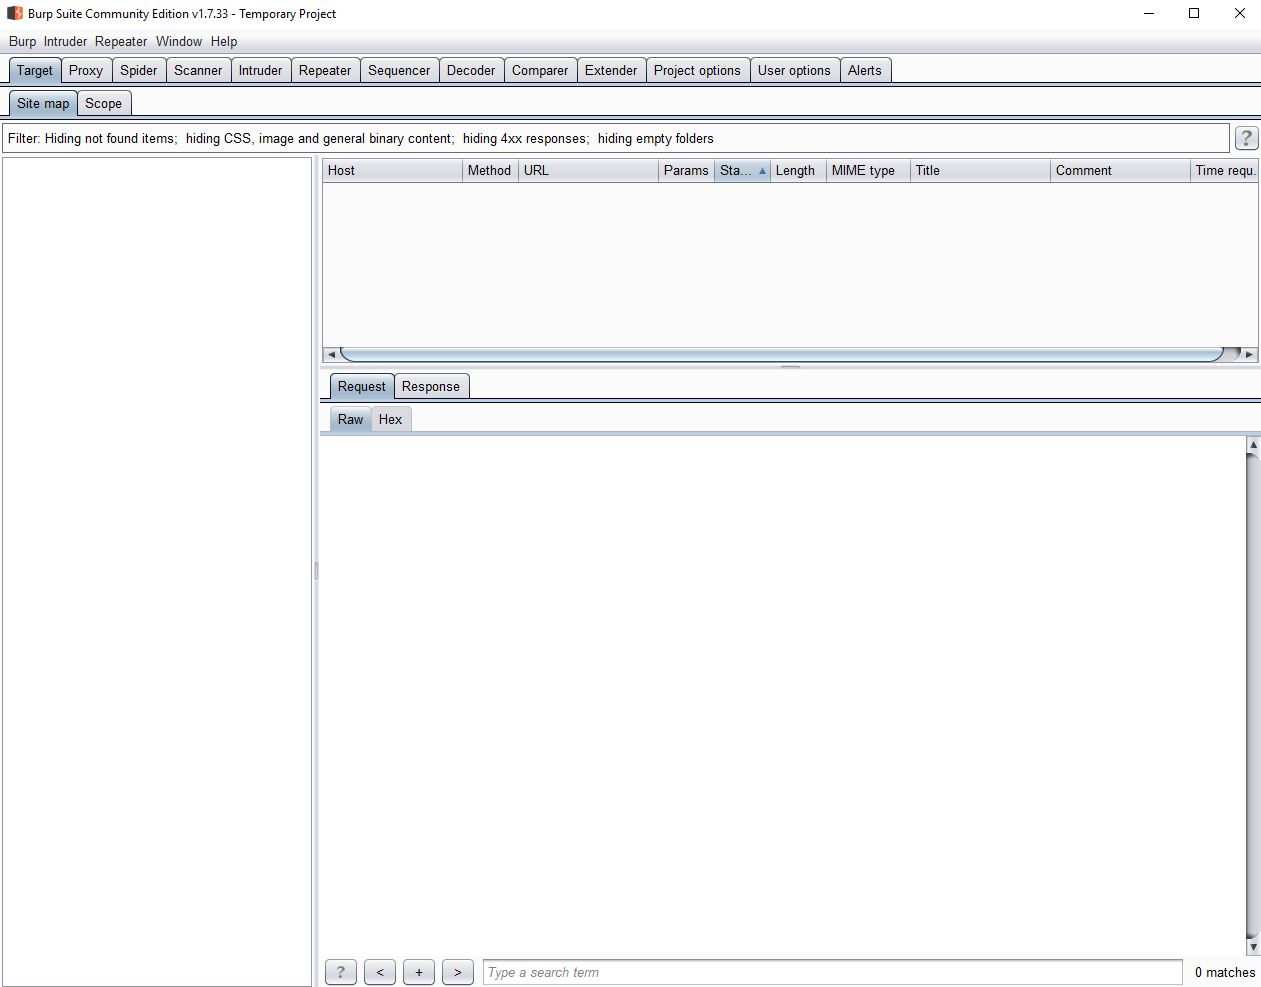
Don’t let the interface intimidate you. Burp Suite is a suite of related tools. We’ll cover this in another post. For now, we just want to export the CA certificate. We will be using Burp as a proxy for our web browser, which means that all traffic will pass through Burp. If this traffic is encrypted (HTTPS), then Burp will have to either:
- Pass the traffic on, without being able to inspect it (because it is encrypted).
- Interfere with the encryption (man-in-the-middle attack). This is what we want.
In order to keep our web browser happy we need to firmly tell it to pretend that everything is all right. We do this by importing a fake certificate and saying it’s “trusted”.
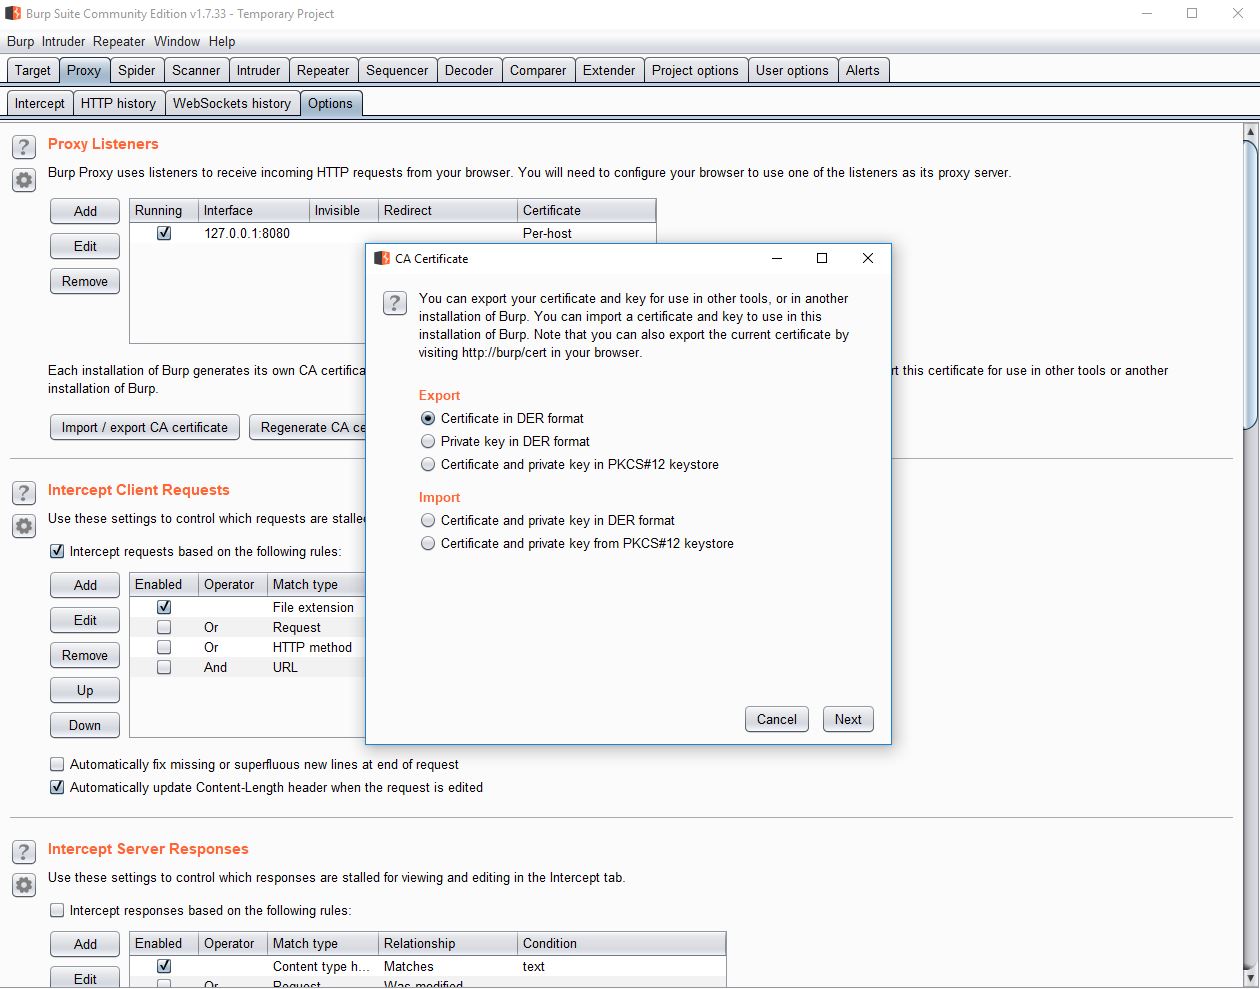
Click “Proxy” in the top tab bar, and then “Options” in the second tab bar. In the top of the options list we’ll find the “Import / export CA certificate”. Opt to export the certificate from Burp in DER format, and save it to Desktop or somewhere convenient.
The Web Browser
I’m not going to impose any web browser restrictions on you. We don’t judge people based on their browser preferences.
Download and install Firefox. You should be able to do that on your own.
When it’s installed, go ahead and open it once just to be sure it’s set up properly. Then close it down.
Firefox Profiles and Configuration
Firefox stores all user data in so-called “profiles”, which are nothing but a folder containing all your data, browsing history, and plugins. I highly recommend using a separate profile when testing, as you might disable a bunch of security features down the line.
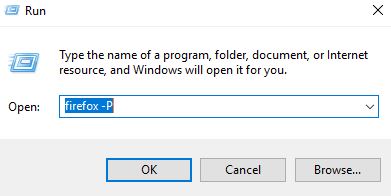
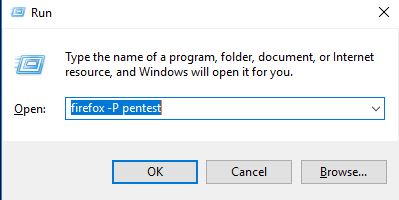
Fire up the Run dialogue (hotkey Win+R) and type “firefox -P” followed by firmly pressing the Enter key on your keyboard.
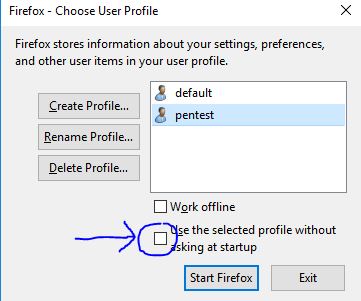
You’ll find the Firefox profile switcher thingie on screen, which I’m sure most users don’t even know exist. Anyhow, you want to create a new profile, give it a good name (I named mine “pentest”), and uncheck the default checkbox. I drew an arrow pointing at it on the above image.
To launch Firefox with a specific profile right away, simply pass the profile name as an argument.
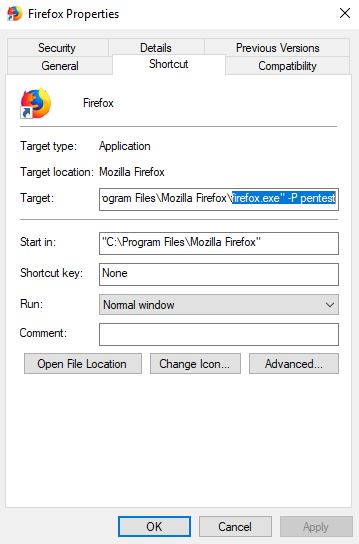
It’s worth mentioning that you of course can save any and all command line arguments in the Windows shortcut. Create a new shortcut and append whatever you need.
Next up is importing the certificate.
To import the Burp CA certificate we go to Settings, then Privacy & Security, scroll down, and click “View Certificates…”. In the resulting dialogue click “Import…” and select the certificate file you exported from Burp.
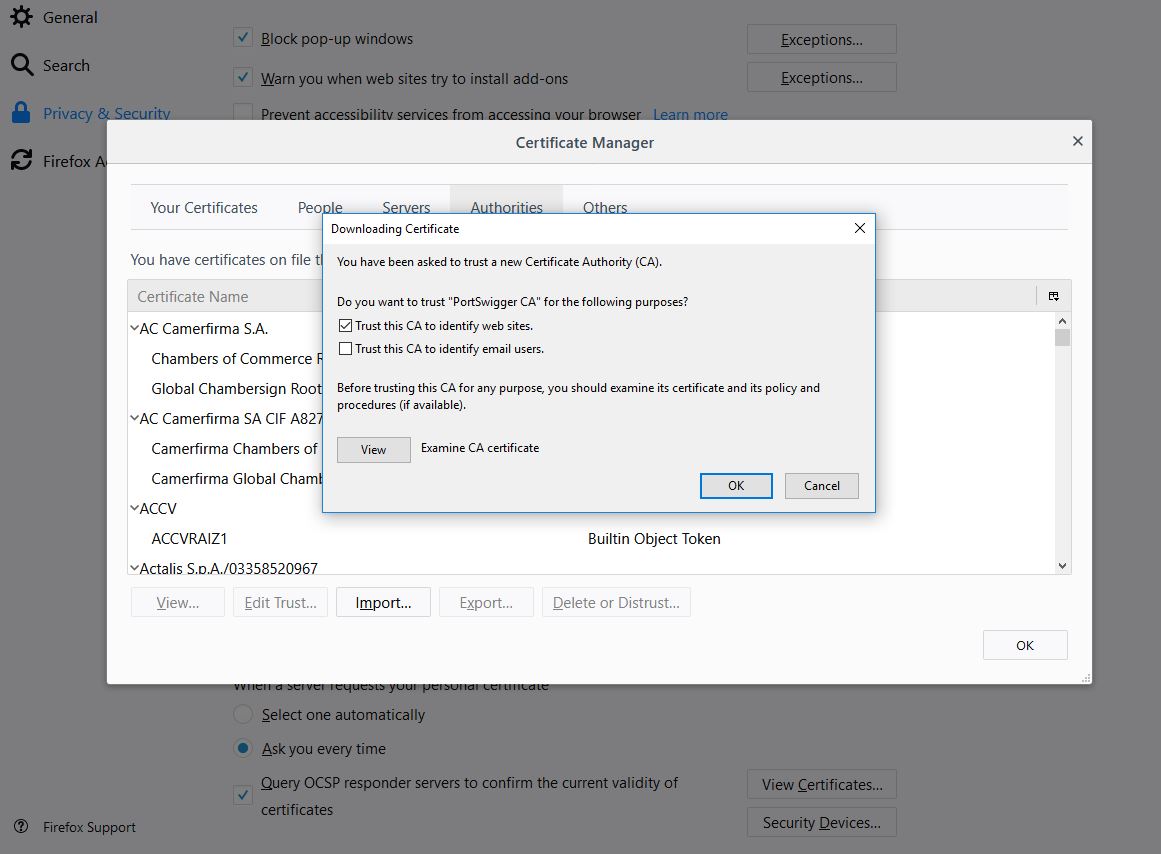
Check the first checkbox, indicating that you want to trust certificates signed by the Burp CA certificate. You should only do this in a user profile you use for pentesting, not a user profile you use to log on to your bank.
Click OK to save. Next up is linking it to our proxy.
I can highly recommend using a proxy switcher of some sort because changing proxies through the Firefox configuration is painful and slow. Though for the sake of minimising the amount of things we need to install, we’re going to set it up the old fashioned way.
Why switch proxies? Well, everything is set up in a separate profile, so your regular browsing is not going to be affected by the settings we save in the pentesting-profile. Though there are occasions when you might need to do some switching in the field, e.g. Burp or Java doesn’t play nice with the remote server when it comes to cipher negotiation, or perhaps you are running two or three instances of Burp or similar tools simultaneously.
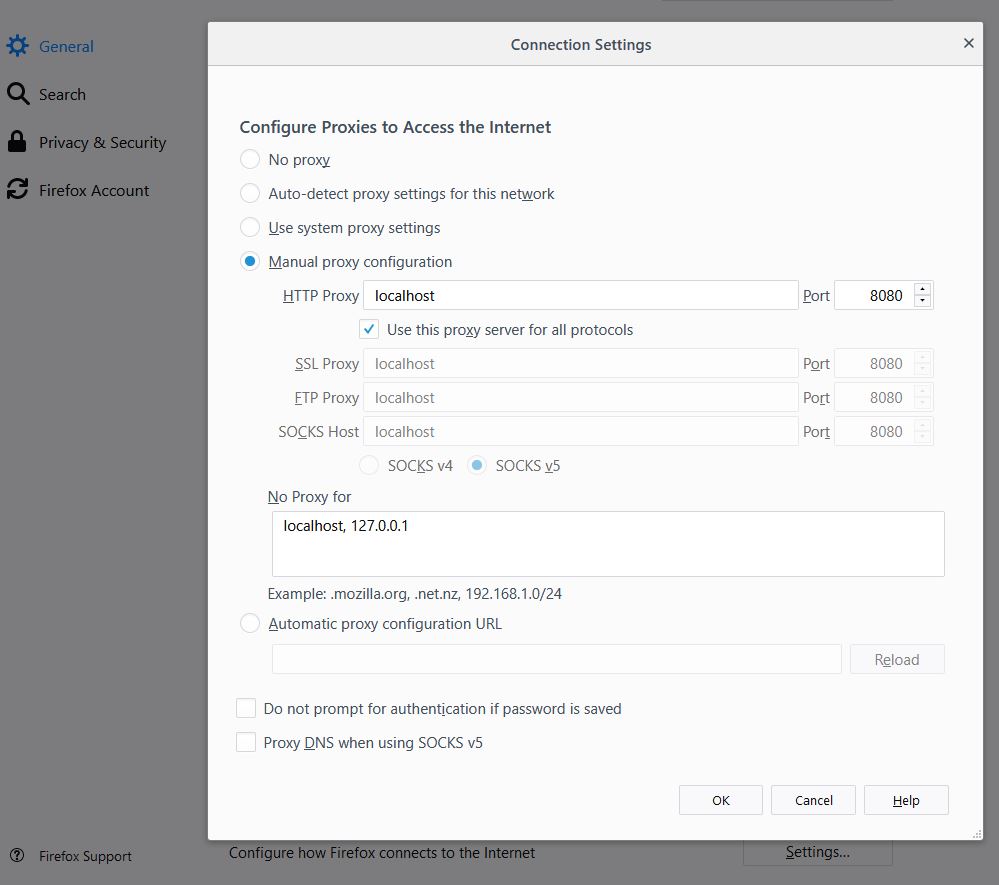
Go to settings, scroll down, open the network proxy settings. Select manual and set it to “localhost” (or 127.0.0.1) and port 8080. The port number should point to the port used by Burp, which is 8080 by default. If you have other software running on that port, then there will be an error message in the Burp logs, and you can set Burp to use a different port. Check “Use this proxy for all protocols” (or at least manually fill in the same values for SSL Proxy).
Note that Firefox will by default ignore the proxy settings if the remote server is at localhost. If you are port forwarding from a virtual machine, or if the application you’re attacking is hosted locally, then you will need to remove localhost and 127.0.0.1 from “No Proxy for” in the dialogue above.
Taking it for a Spin
In Firefox, go to http://example.com/ or any other unencrypted site. It should be stuck loading (most likely). Open up your Burp window.
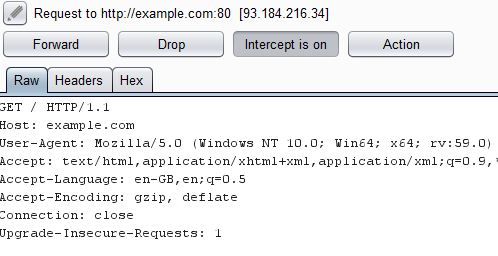
If that works, go to a secure page such as https://example.com and inspect the certificate.
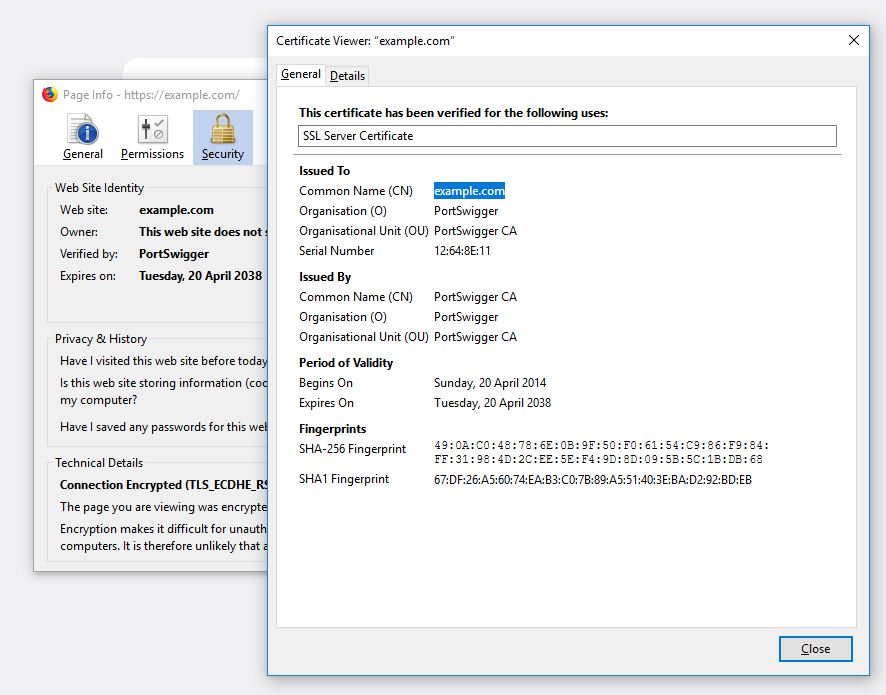
You shouldn’t get any errors. If you get a certificate warning, then you most likely forgot to import and trust the Burp CA certificate.
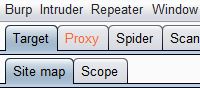
You should also go to Proxy/HTTP History and make sure you can see the requests there.
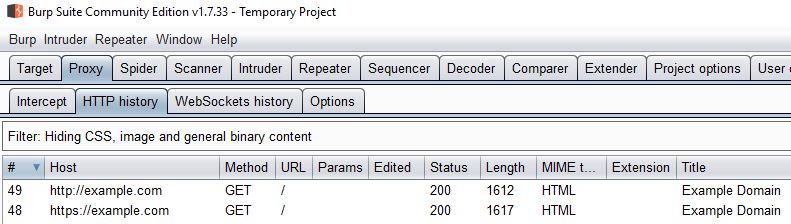
There’s a bunch of filters affecting your view by default, so don’t worry if you can’t see everything. The important thing is that you have at least one HTML document on HTTP, and one on HTTPS.
That’s it! I hope the guide helped you get started by showing you a simple example and how to set it up. Let me know if you get stuck or if something isn’t clear :3!